Posted: January 14th, 2013 | Author: max | Filed under: API, Plugin | Tags: API, Plugin | No Comments »
To make it easy to build apps with AT&T API, we just added the AT&T OAuth API Plug-in. The plug-in sets up the OAuth 2 authentication by returning an access token which then can be used to invoke any other AT&T API.
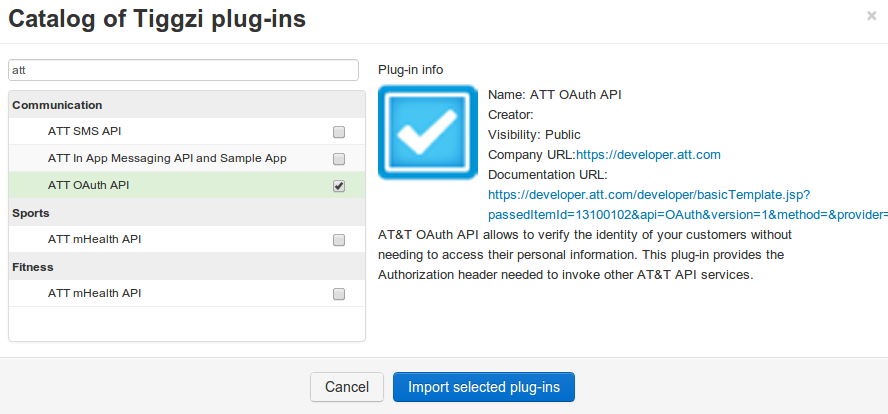
To import the plug-in, select Create New > From Plug-in > ATT OAuth API:
Once the plug-in is imported, open ATT_Settings file:
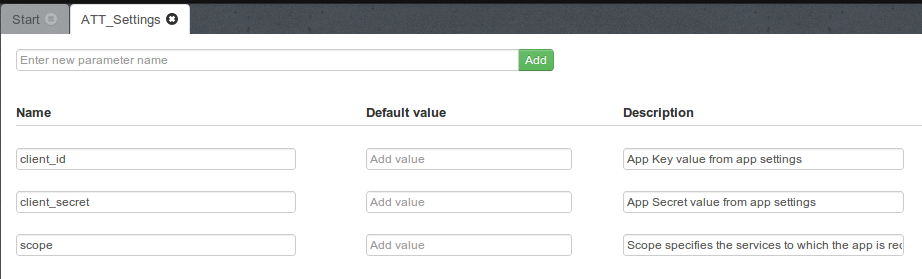
and set the client_it, client_secret, and scope. The client_id, and client_secret will be available once you register an app at http://developer.att.com. The scope value depends on the API you are going to use. For example, if you the Location API, it will be TL. Refer to docs for the correct scope for each API.
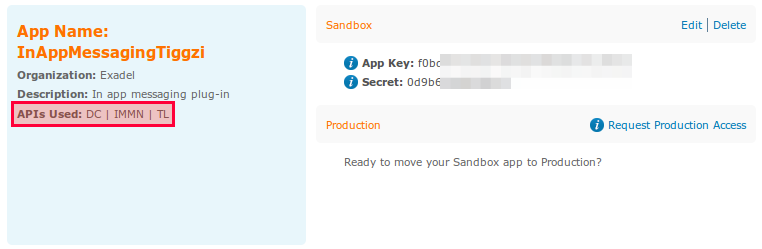
Here is an example of a registered app with three scopes (in red):
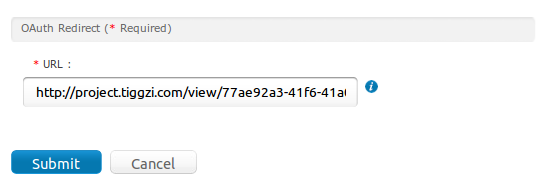
One more thing that needs to be set is the OAuth 2 redirect (or callback URL) in app settings
For the callback URL to work correctly, also do the following in the Test window (upper right):
- Uncheck Open in mobile frame
- Make the app pulbic
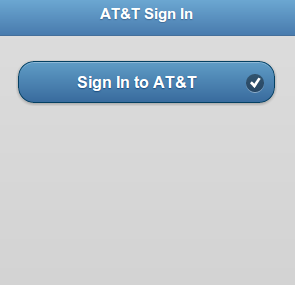
When running the app and you are not signed in into AT&T, you will see this page:
when signed in, you will see the access token:
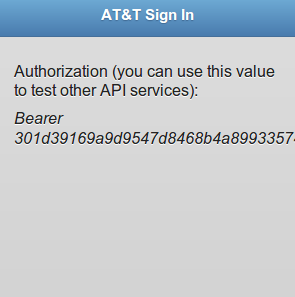
The access token is also stored into local storage so you can use it to invoke other AT&T APIs.
Posted: January 14th, 2013 | Author: max | Filed under: API, Plugin | Tags: API, Plugin | No Comments »
Learn how to add and send in app messages from your number with new AT&T In App Messaging API Plug-in.
Posted: January 4th, 2013 | Author: max | Filed under: API, Plugin | Tags: API, Plugin | No Comments »
Best Buy Products API and Sample App plug-in provides a simple, REST-based interface for entire product catalog - past and present. This includes pricing, availability, specifications, descriptions, and images for over a million current and historical products.
Adding the plug-in to your app
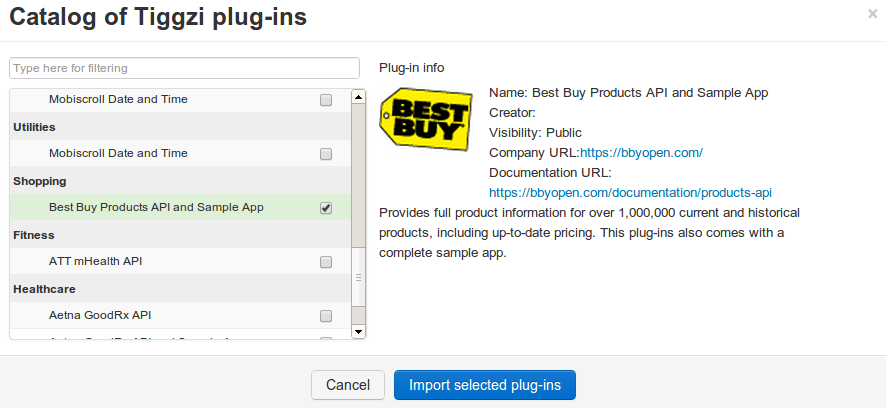
To add the Best Buy Products API and Sample App plug-in, from Tiggzi builder, select Create New > From Plug-in. Open Shopping, then select Best Buy Product API:
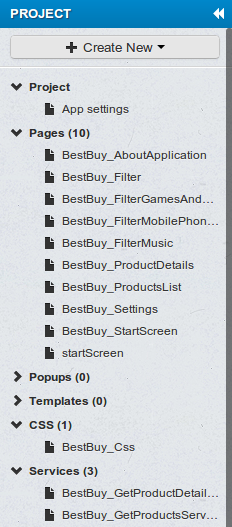
Click Import selected plug-ins. The plug-in will be imported and you will see all its files in the Project view:
Before you run the app, we need to enter the Best Buy API key. Open Services/BestBuy_Settings file and enter your API key:
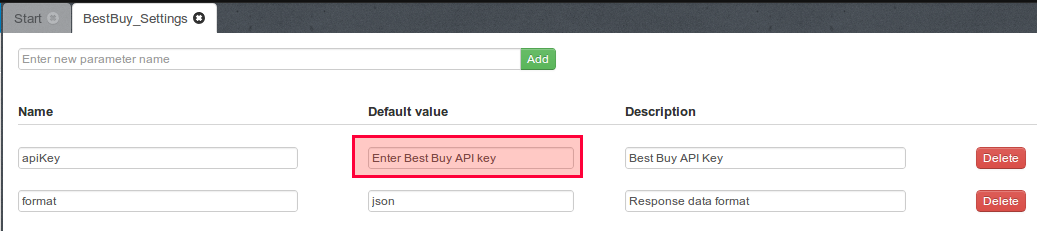
If you don’t have an API key, get it from Best Buy.
Running the sample app
You can now launch the app by clicking the Test button (in the upper right corner). If a blank page opens up, go to Project/App settings and set the Start Page to BestBuy_StartScreen.
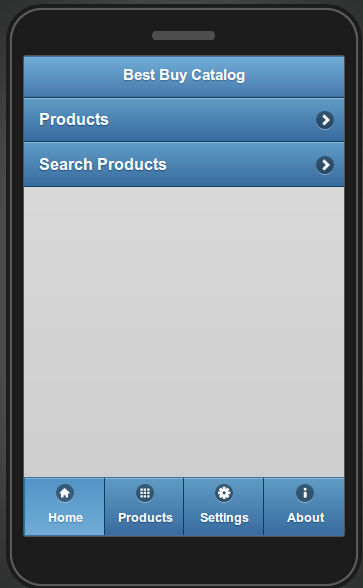
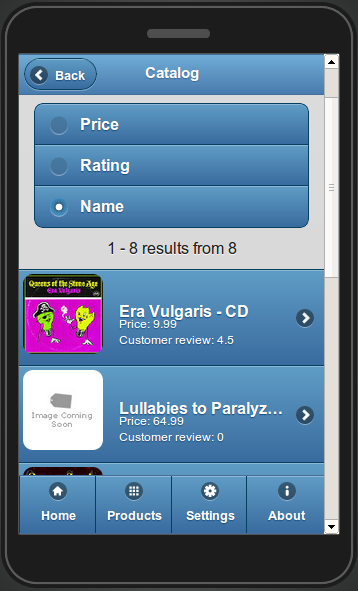
The starting page of app contains the main menu bar at the bottom of the page and the navigation elements to the catalog of products as shown below:
The plug-in allows you to access the categories list to make the search of products easier. Each category contains search attributes for each product type (only music search is supported in current version). Here is an example performing search via Product Categories:
Click on the Products button on the Home page. The list of categories is displayed on the Products page:
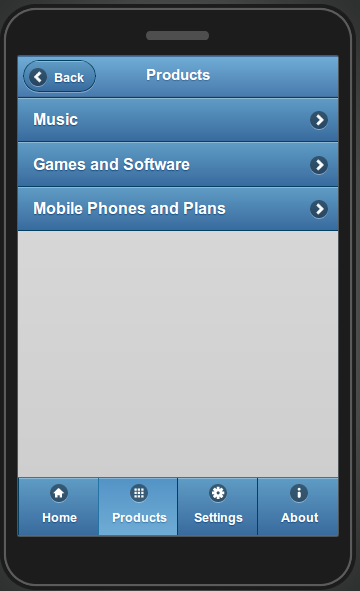
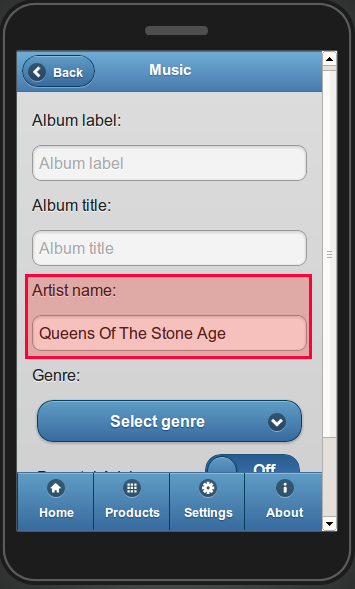
Click on the Music button. The search attributes for music products are displayed on the page:
- Album label (text field)
- Album title (text field)
- Artist name (text field)
Genre (drop-down) contains four options:
Parental Advisory (check box)
All the attributes are optional.
Enter any search criteria (e.g. Artist name: Queens Of The Stone Age) and click on the Search button:
The results are displayed on the Catalog page. This page also contains the Keyword filter field and the sorting radio-buttons. By default the results are sorted by Name in ascending order:
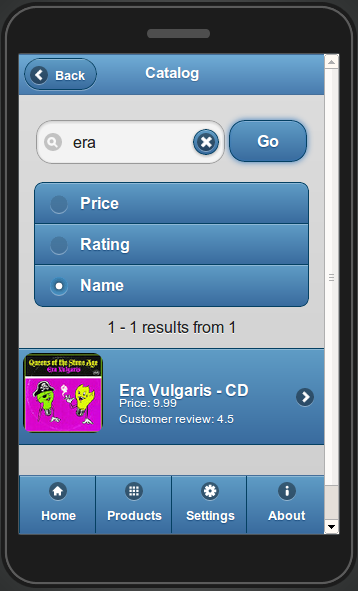
To filter your results use the Keyword field. Type in the Keyword field ‘Vulgaris’ and click on the Go button. To erase the field use the Cancel button as shown below:
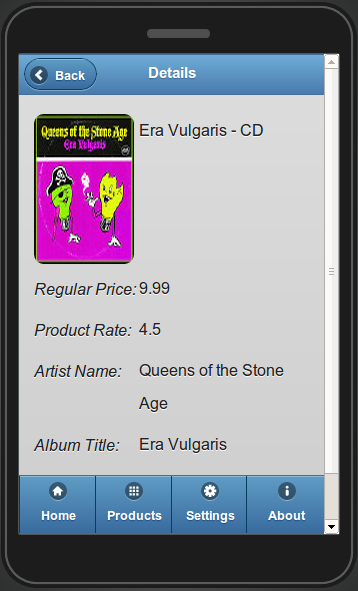
Click on the Era Vulgaris item to get the product details. The page renders the image preview to the item and the available attributes as shown below:
Click on the Back button in the upper left corner to navigate back through all the described steps.
You can use the Main Menu bar to navigate quickly to the Home Page or/and the Products page.
On the Home page, click on the Search Products button. This performs the defaults search without any search attributes. When invoked – all the available item are displayed in the list. If no required items found – ‘No results found’ message renders.
REST API services used in the plug-in
Now that we’ve seen how this sample app works, let’s dig deeper to see how the Best Buy Products API is exposed in Tiggzi platform.
The following REST services are used for getting information from Best Buy Products API:
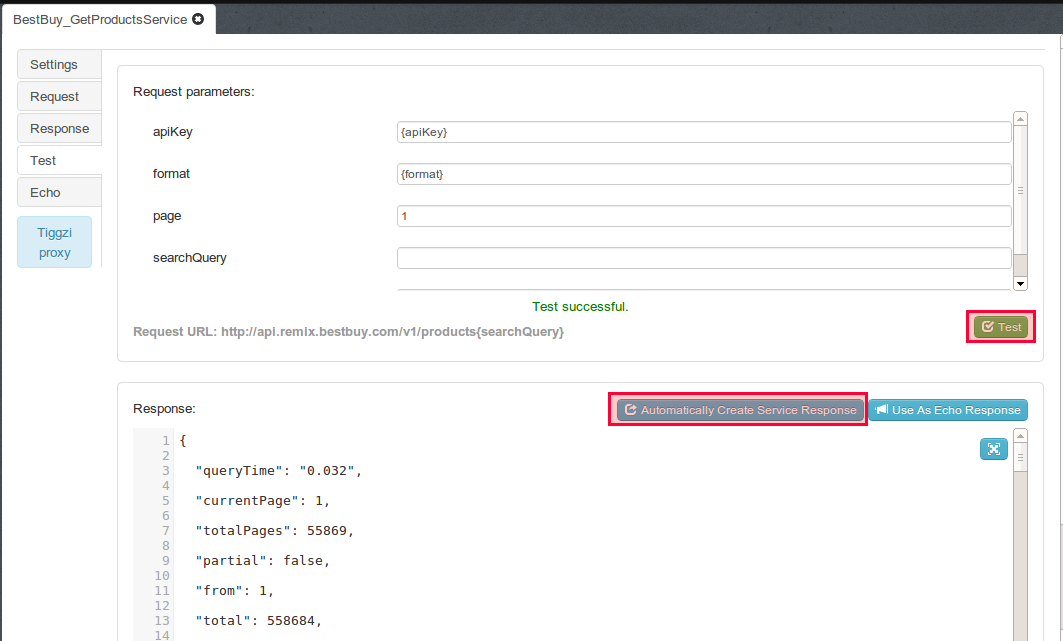
BestBuy_GetProductsService service is used for getting the list of required products. REST service Settings display the URL, and other settings:
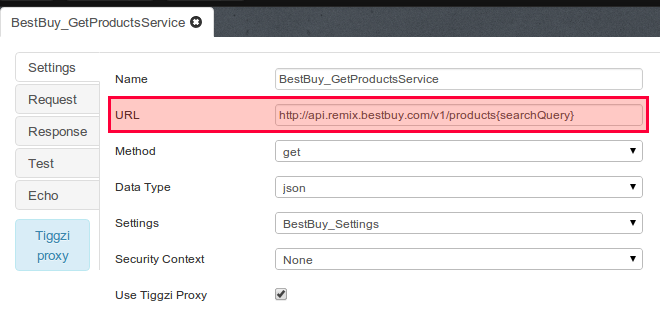
The {searchQuery} will be set when the app is running, based on user input.
Request tab shows the request parameters defined in the service:
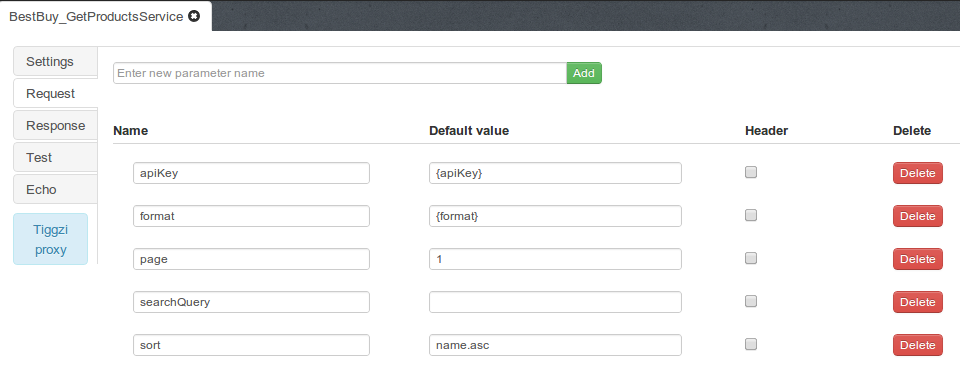
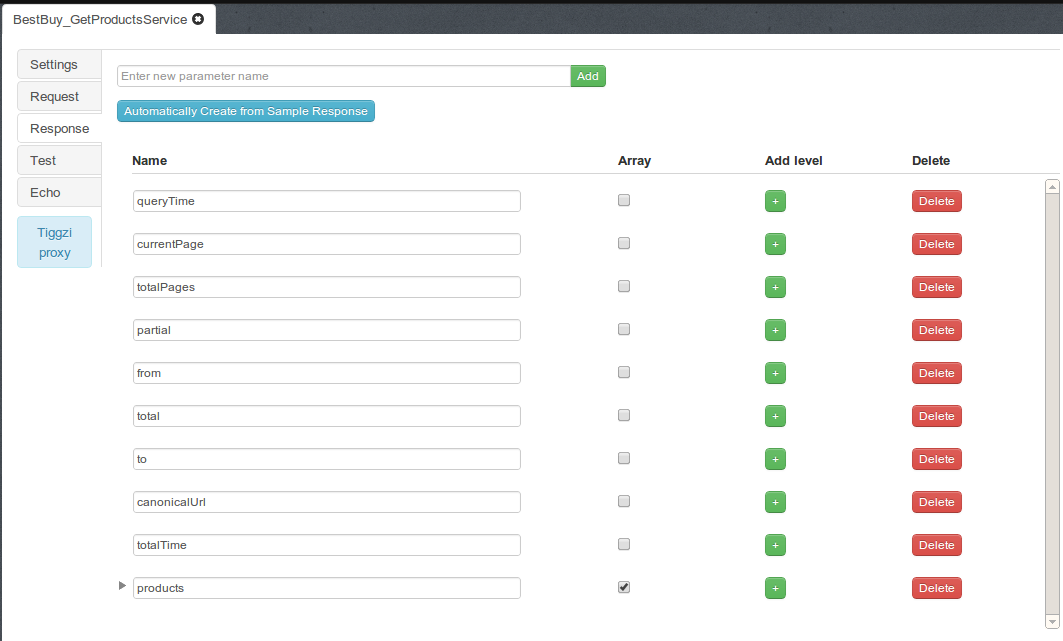
Response parameters are automatically created after doing a service test (in Test tab):
Response parameter:
All other services are set in the same way.
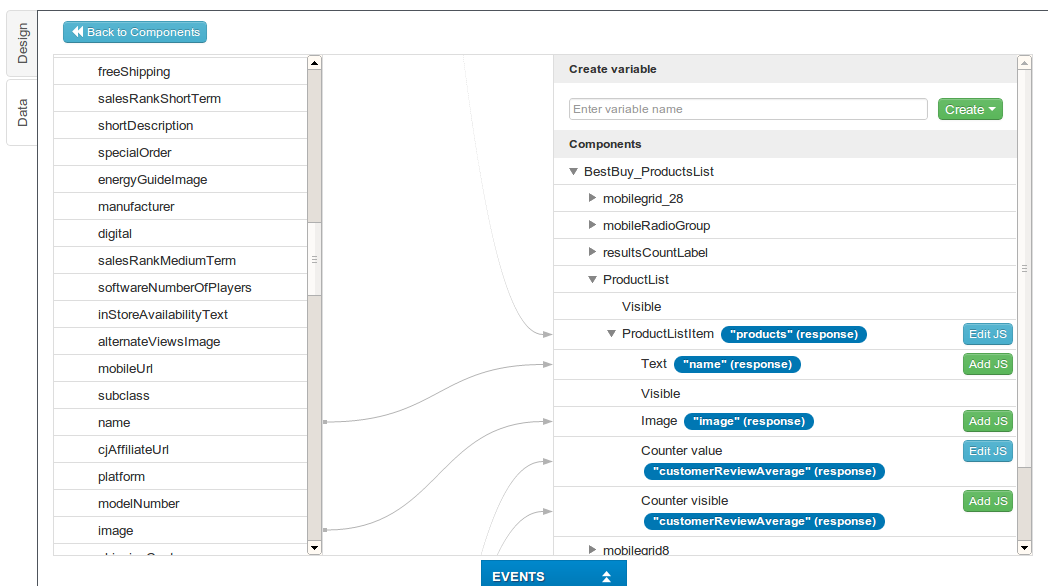
Once a service is added to the page, it is then mapped to the page (request and response):
Posted: January 2nd, 2013 | Author: max | Filed under: API, Plugin | Tags: API, Plugin | No Comments »
How the plug-in works
 Aetna GoodRx API and Sample App plug-in can be instantly added to any new or existing app and allows a user to search, navigate, and compare prices for drugs. Aetna GoodRx is offering RESTful services that help to find the lowest retail cash price as offered by a national chain pharmacy for a given pharmaceutical. In addition, user will receive a URL for each result that will navigate to the page in the GoodRx mobile web experience that will display the pharmacy that is offering that price, and even find the closest branch to on their current location.
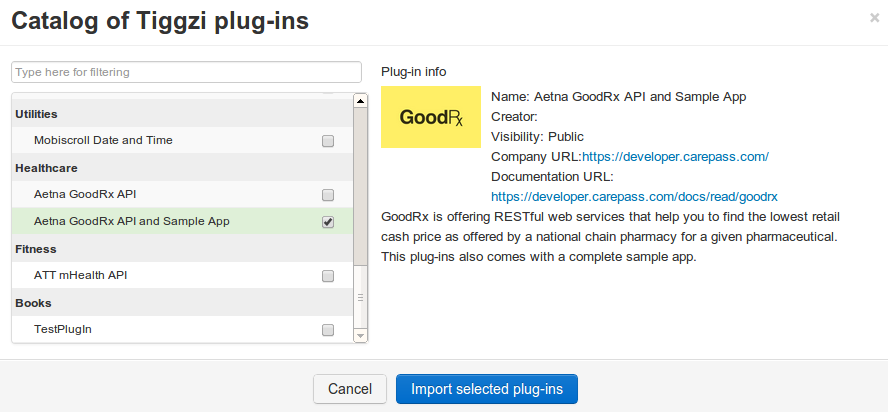
The ready-to-run app makes it super easy to start using the API. To add Aetna GoodRx plug-in:
- From Tiggzi builder, select Create New -> From Plug-in
- Open Healthcare, then select Aetna GoodRx API and Sample App
Using GoodRx API requires an API key which you can get from http://developer.carepass.com. To enter the API key, open Services/Aetna_GoodRx_Settings file:

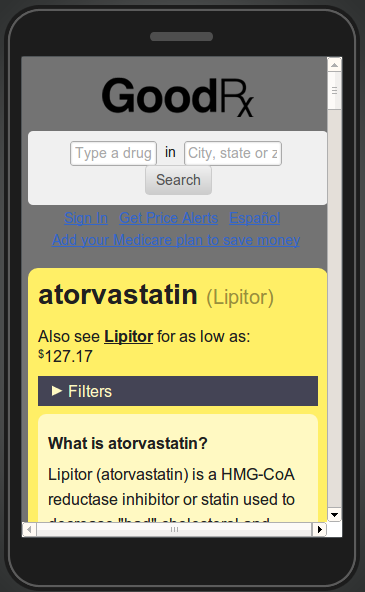
Once the API key is set, click on the Test button (upper right corner) to launch the app in the browser. The first page looks like this:
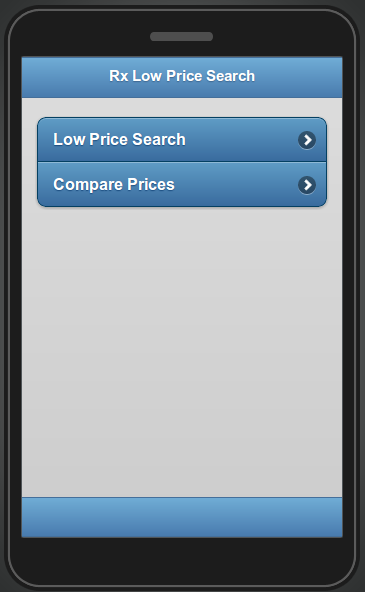
Clicking on Low Price Search link, will show the following page:
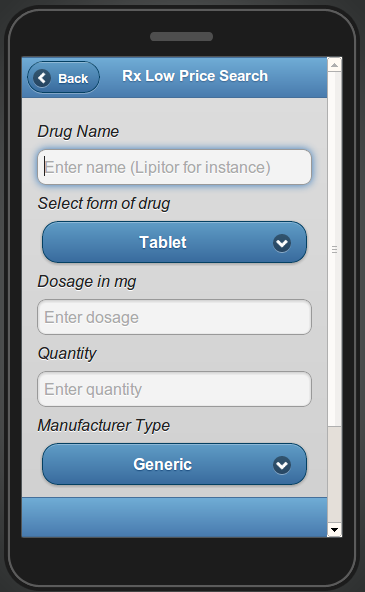
The Low Price Search page contains the search attributes for drugs as follows:
- Drug Name (open text field, required)
- Select form of drug (drop-down, optional).
- Possible value:
- Tablet
- Capsule
- Injectable
- Liquid
- Dosage in mg (optional, requires digits)
- Quantity (optional, requires digits)
- Manufacturer Type (drop-down, optional)
- National Drug Code Directory identifier (open text field, optional)
To test the app, enter the following values shown below:
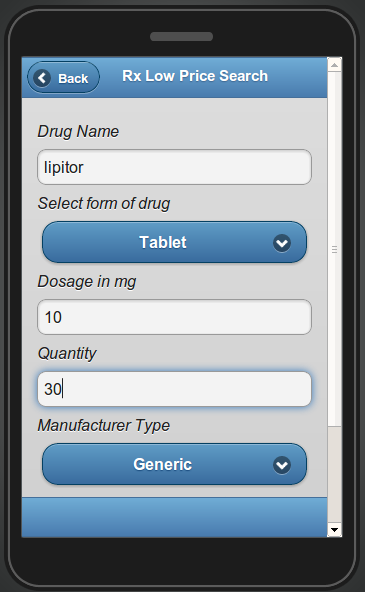
Clicking Search (at the bottom of the page), will result in the following page:
The page shows information about the drug as well as information (scroll down) where it can be purchased.
Inside the plug-in
Now that we’ve seen how this sample app works, let’s dig deeper to see how the GoodRx API is exposed on the Tiggzi platform.
The following REST services are used for getting information from GoodRx API.
Aetna_GoodRx_LowPrice service
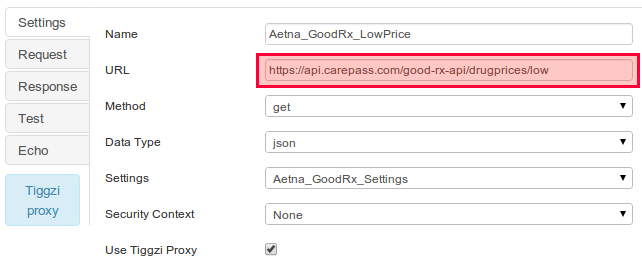
Aetna_GoodRx_LowPrice is used for getting the list of the lower prices of the requested drugs. The URL and the main settings of the service as shown below:
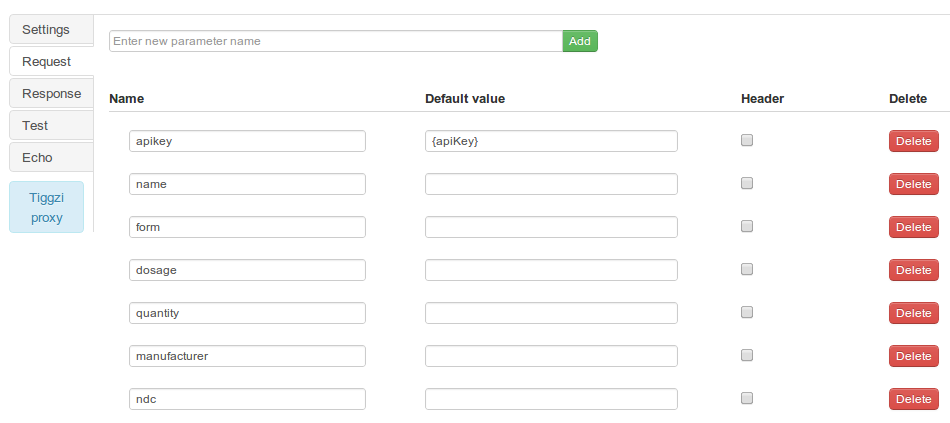
The request parameters are displayed under the Request tab:
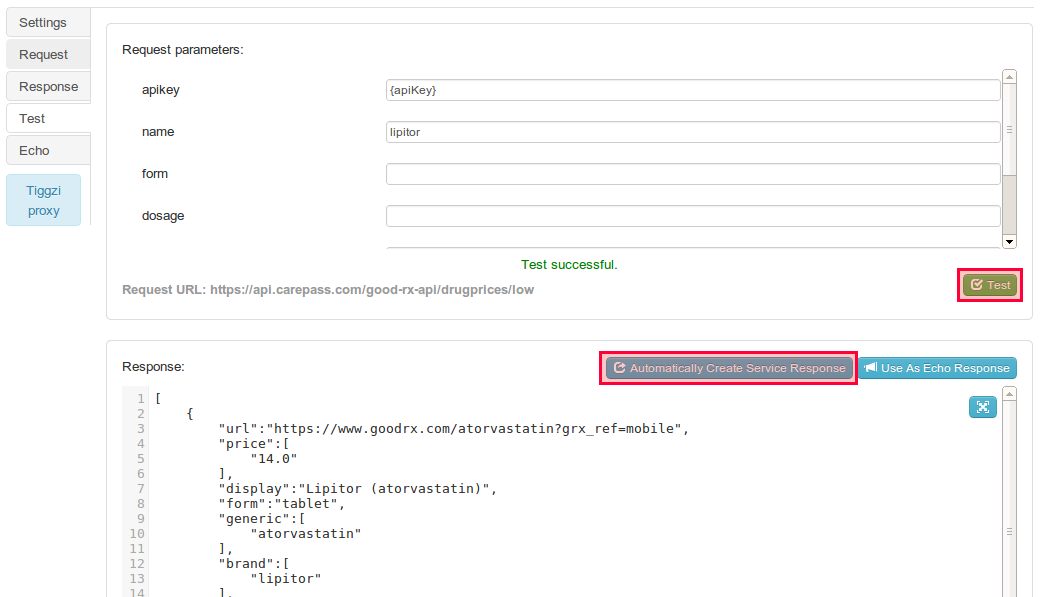
To generate the response parameters navigate to the Test tab, enter the name of the drug and click on the Test button, and then click on the Automatically Create Service Response button as shown on the screen below:
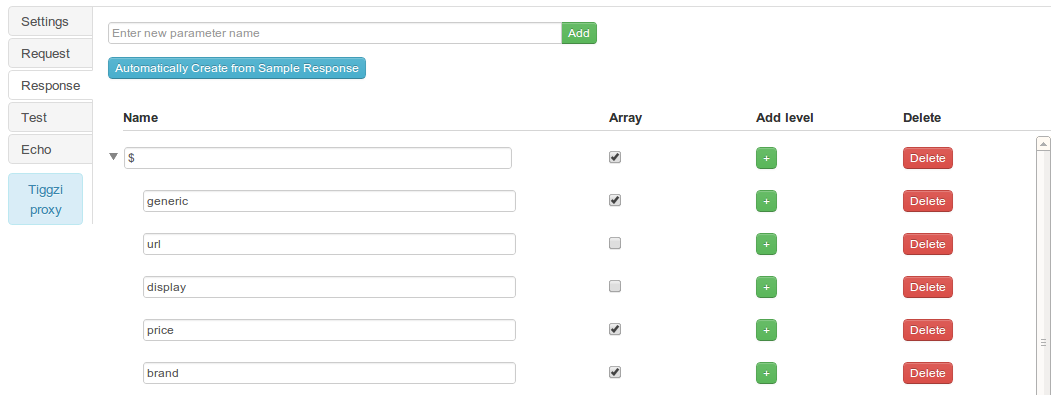
All the created response parameters are displayed under the Response tab:
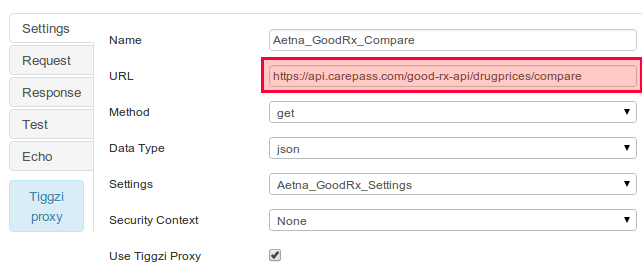
Aetna_GoodRx_Compare service
Aetna_GoodRx_Compare is used for getting the list of the lower prices of the requested drugs and available stores. The URL and the main settings of the service as shown below:
Aetna_GoodRx_Settings service
This service holds the API key. You will notice that both services use this service in Settings:

Posted: December 17th, 2012 | Author: Charley Cowens | Filed under: API, Plugin | Tags: API, Plugin | No Comments »

We’ve just made the ESPN Headlines API and Sample App plug-in available. The API allows you to interact with ESPN’s various news stories. (ESPN publishes hundreds of unique pieces of text content each day, covering dozens of sports and hundreds of athletes and teams.) To make it easier to use the API to make mobile apps in Tiggzi, we created a plug-in with some ready-made services (interfaces) to use the ESPN API.
To add this plug-in to an app, you will just need to follow these steps in Tiggzi:
- From the Tiggzi builder, select Create New and then From Plug-in.
- Click the check box for Sports/ESPN Headlines API and Sample App, and then click on the Import selected plugins button.
- Open Services/ESPN_Settings file and set your API key. If you don’t have, get one from http://developer.espn.com/
Once you’ve created a new app based on this plug-in, you actually have a simple ready-to-run demo app. Just click the Test button in the right upper corner of the screen to see it work. In this tutorial, we’ll first walk through the sample app included with the plug-in. Then, we’ll show you, “under the hood,” some of how to the API is used in developing the app.
The App
To find news you are interested in using the app, you follow these steps:
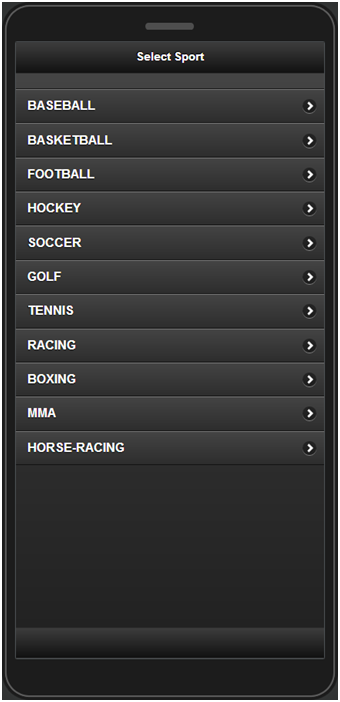
- On the start page, select a sport (e.g., Golf) from the available sports displayed in the list:
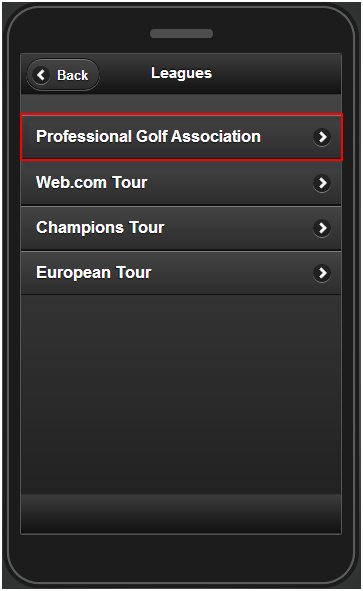
- You will then be sent to the Leagues page which contains the list of existing leagues (if applicable). Select the Professional Golf Association league:
- The Headlines page shows. The headlines are listed by titles and preview images. Select one of the headlines.
- The Details page will display a short description of the news with the cover photo (if available). At the end is the URL of the original article on the ESPN web site.
- Use the Back button to return to the previous pages and search for other news.
Under the Hood
Now that we’ve walked through the app, let’s take a peek under the hood.
Services
Services from the plug-in are linked to UI components as part of the design of the app. The following REST services that are defined in the ESPN API plug-in are used in the app.
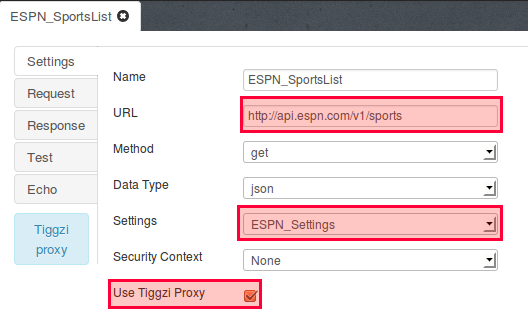
ESPN_SportsList service
The ESPN_SportsList service is used for getting the list of available sports. REST Service Properties displays the URL, main settings, and whether a proxy is used as shown below:
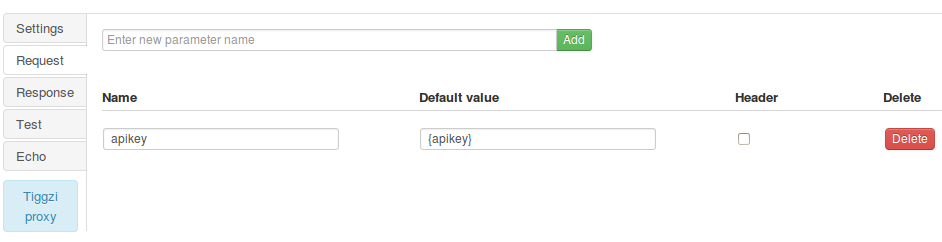
Request Parameters contains the parameter sent to the ESPN service:
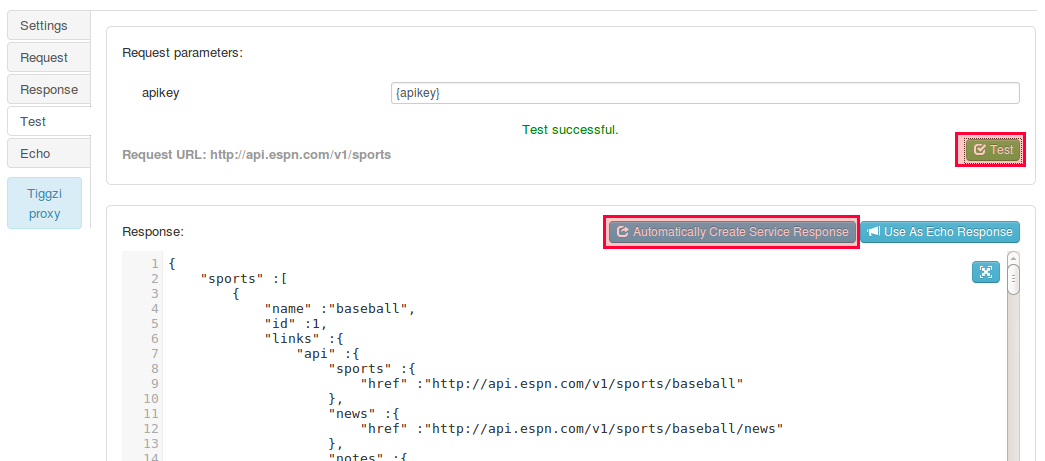
The service can be instantly tested and the response created automatically based on the return response (JSON):
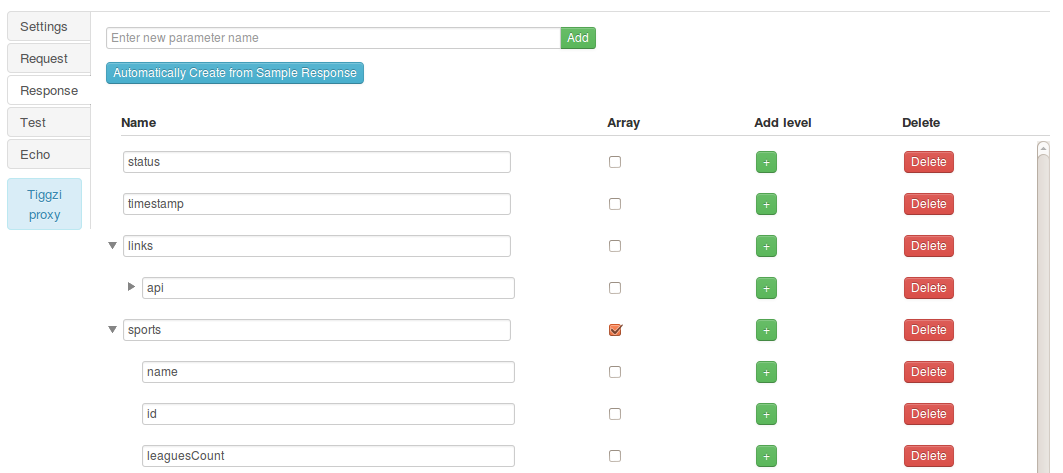
Response parameters:
The other services are set in the same way with their own parameters.
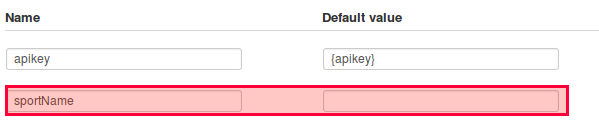
ESPN_SportByName service
This service is used to get a list of leagues for a given sport:
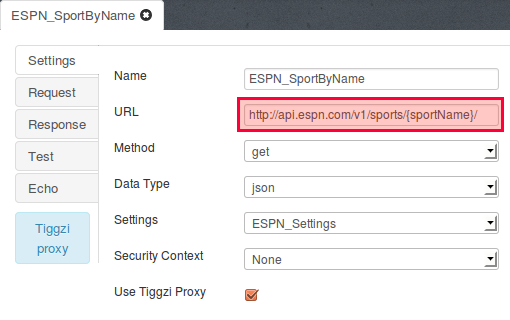
The {sportName} value is substituted in mapping when the service is running based on the selected sport:
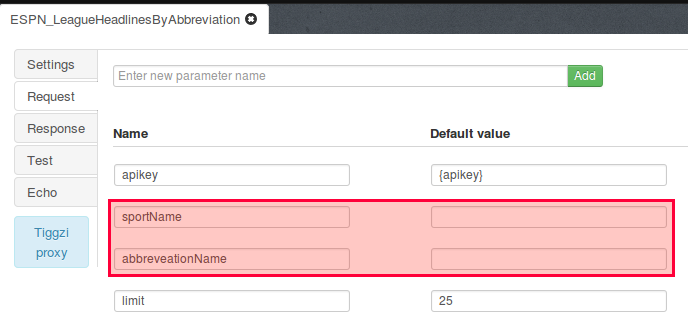
ESPN_LeagueHeadlinesByAbbreviation service
This service is used to get the headlines for that sports league.
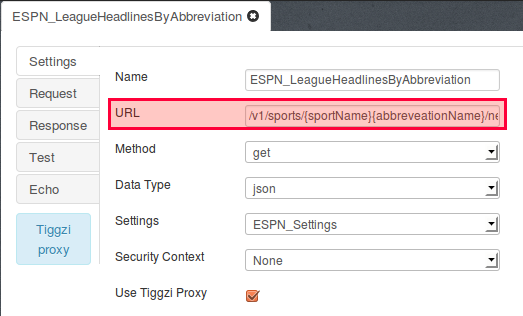
{sportName}, and {abbreveationName} are set when the service is running:
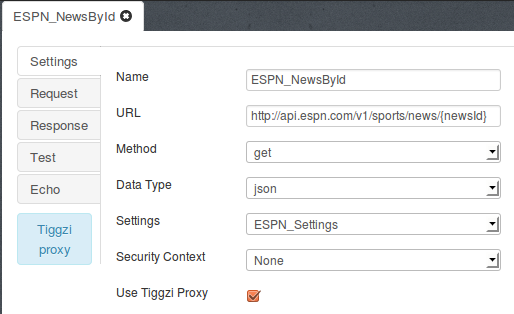
ESPN_GetNewsById service
This service is used for getting the details for each news item:
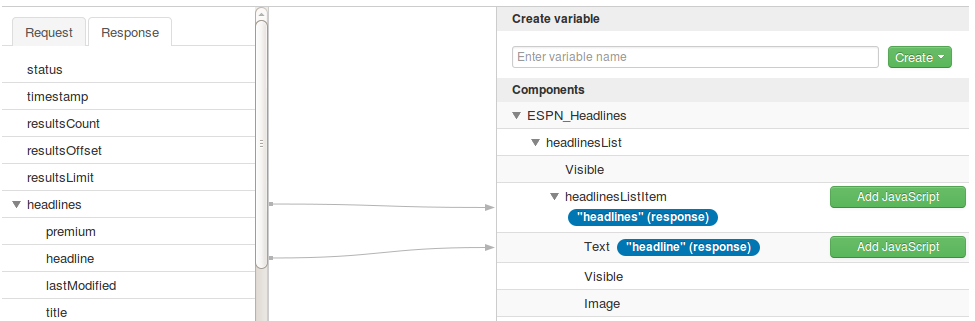
Mapping the UI to the Services
The final part in the app design is mapping service parameters to UI components. Here’s an example of this in action showing response parameters being mapped to output components:
Posted: September 24th, 2012 | Author: max | Filed under: API, Plugin | Tags: API, Plugin | 2 Comments »

Last week we published the first version of Singly plug-in in Tiggzi. This means you can connect to Singly API in Tiggzi builder in just a few seconds. This also means you can use Singly API to connect to over 18 social networks, integrate people’s contacts, photos, locations, fitness data, and more into your app.
Here is how to get the plug-in.
From Project view, select Create New > From Plug-in:

Select Singly API plug-in:

You will be asked to enter the Client ID and Client Secret. You get it from Singly.com (after creating a free account and registering an app):

If you don’t enter the values during import, you can always set these ids by going to Project/Services/SinglySettings.
Once the plug-in was imported, go to Project/Project Profile and set SinglyStart to be the first page to launch. Go ahead the launch the app. You will be asked to login to Twitter (that’s the default service set) and then should get something like this (it will be your Twitter information):

To change the service, open SinglyStart page, select the button and open Run Custom JavaScript action (Events tab). You will be able to see the initial request to Singly and the place to change the service.
Give it a try and let us know what you think. One thing to keep in mind, the current version will only work as a mobile app (it will not run as native). I’m working with Jeremie Miller form Singly to support hybrid apps as well as other APIs. Do let us know if you would like us to add a specific feature.
Posted: September 13th, 2012 | Author: max | Filed under: API, Plugin | Tags: API, Plugin | 4 Comments »

We just made available the Twilio SMS API plug-in. This means if you need to send SMS messages from your mobile app, you can quickly use the Twilio SMS API plug-in. We will show you how to add the plug-in but you do need to sign up for free Twilio account. You will will get a Twilio phone number and you will also need to verify at least one phone number (where you would like to send SMS messages). If you go with a paid plan, you will be able to send SMS messages to any number.
From Tiggzi builder, select Create New > From Plug-in:

Open Communication, then select Twilio SMS API:

Click Import selected plug-ins button. You will then see a prompt to enter the Twilio Account SID and Twilio AuthToken:

Both are available from the Dashboard:

If you don’t enter these values during the import step, you can always enter them by going to Project > Services > TwilioSettings.
Open TwilioSMS page. The UI is ready, there is a service and mapping (not shown) all completed. Everything is ready to go. You can of course change the UI to fit your application.

Note: when you import a plug-in, the current app theme will be used in the imported page (so your theme will probably be different).
Click the Test button and you should see a page like this:

Posted: July 18th, 2012 | Author: max | Filed under: API, Database, Mobile Backend, Plugin | Tags: API, Database, Mobile backend, Plugin | No Comments »
Last weekend we participated in the AT&T Mobile Hacktathon hosted by StackMob. Just before the event we published StackMob API plug-in in Tiggzi app builder so that it would be very simple to connect to StackMob. Here is how easy it is to connect to StackMob.
In Tiggzi app builder, select Create New > From Plug-in, then select the StackMob plug-in:

When you click to import the plug-in, you will be asked to enter StackMob key that identifies your app:

If you won’t enter the key right away, you can always set it by going to Services/StackMobDatabseSettings file.
The StackMob service looks like this:

You will notice that the URL has [objectName] in it. Simple set it to the object schema name defined in StackMob. My object is called messages so the updated URL would be this:
https://api.mob1.stackmob.com/messages
The service does a GET by default but you can set it to do any other action.
We can now instantly test the service. Open Request Parameters panel and click Test Connection:

We get result back which means our service works (you should create a few sample objects in StackMob before testing). The service input is defined, we now need to define the service output. That can be done automatically by clicking Populate Response Structure button.

Once the service is ready, add it to the page, and bind the service to the UI:

and finally run the app:

Posted: June 20th, 2012 | Author: max | Filed under: API, Plugin | Tags: API, Plugin | 2 Comments »

If you plan to use MongoLab database in your app, it’s now even simpler with our new MongoLab database plug-in. Here is how to create one.
Click to import a plug-in:

then select Mobile and click MongoDB Database API:

next you will be prompted to enter database API key and database name. Both values can be found in your MongoLab account:

If you don’t set these values during import, don’t worry. You can also set them in Services/MongoLab_Settings after the import.
In addition to API key and database name you also need to set the collection name (as we don’t have that information). The collection name is defined and set in Request Parameters panel:

In the Default Value column enter the collection name. You may also set the collection name directly in the URL. The reason collection name is set in request parameters and not in the settings file is because it will change often while the other values are most likely going to stay the same.
Once the service is imported, you can test the service and automatically create the response structure from it.
Posted: June 18th, 2012 | Author: max | Filed under: API, Plugin | Tags: API, Plugin | No Comments »

We were getting a lot of questions how do you send email from your mobile app? We would always tell user to use SendGrid, a wonderful cloud service that provides REST API for sending out emails. Today we released SendGrid Mail API plug-in in Tiggzi. All it takes now is a few clicks and you are ready to send emails from your mobile app.
To import the plug-in, click the block button in Project view:

Open Communication category and select SendGrid Mail API:

Click Import selected plug-ins button. You will be prompted to enter api_user and api_key values. Before being able to send out emails with SendGrid you need to sign up for an account (they do offer a free plan). You will then get a api_user and user_key. You may skip entering these values right now. You can always set them in Project/SendGrid_Settings.
Once the plug-in is imported, you will have page called Sendmail that looks like this:

The UI is built with jQuery Mobile.
You can also open the REST service (SendGrid_MailSend). The URL is defined here:

Request parameters:

{api_user} and {api_key} are set in SendGrid_Settings.
And finally the service mapping (UI to service):

This REST service has additional option parameters which are described here. You may modify the service as you need. SendGrid provides other API’s that you can find here.
Have fun building apps in Tiggzi, now with SendGrid email API.